In this tutorial we’ll show you how to create an ecommerce website with Shopify – the easy to use online store builder. We’ll guide you in building a retail site for your business to sell products online, without the need to learn any programming.
Shopify has become one of the most popular ecommerce platforms for good reason. It is designed to make building an online store as easy as possible, allowing you to design and create your website with a wide range of templates, integrate payment processing via PayPal or debit / credit cards, and even buy your domain name via through Shopify.
Website hosting is also included with your online store, so creating an ecommerce store with Shopify requires no real technical knowledge or experience. You just need an idea and a product to sell.
Step By Step Guide to Setting Up Your Online Store
Follow the easy steps below to set up your online store with Shopify, who offer a free trial of their ecommerce platform so that your can try it out to see how you get on.
1. Start the free Shopify trial
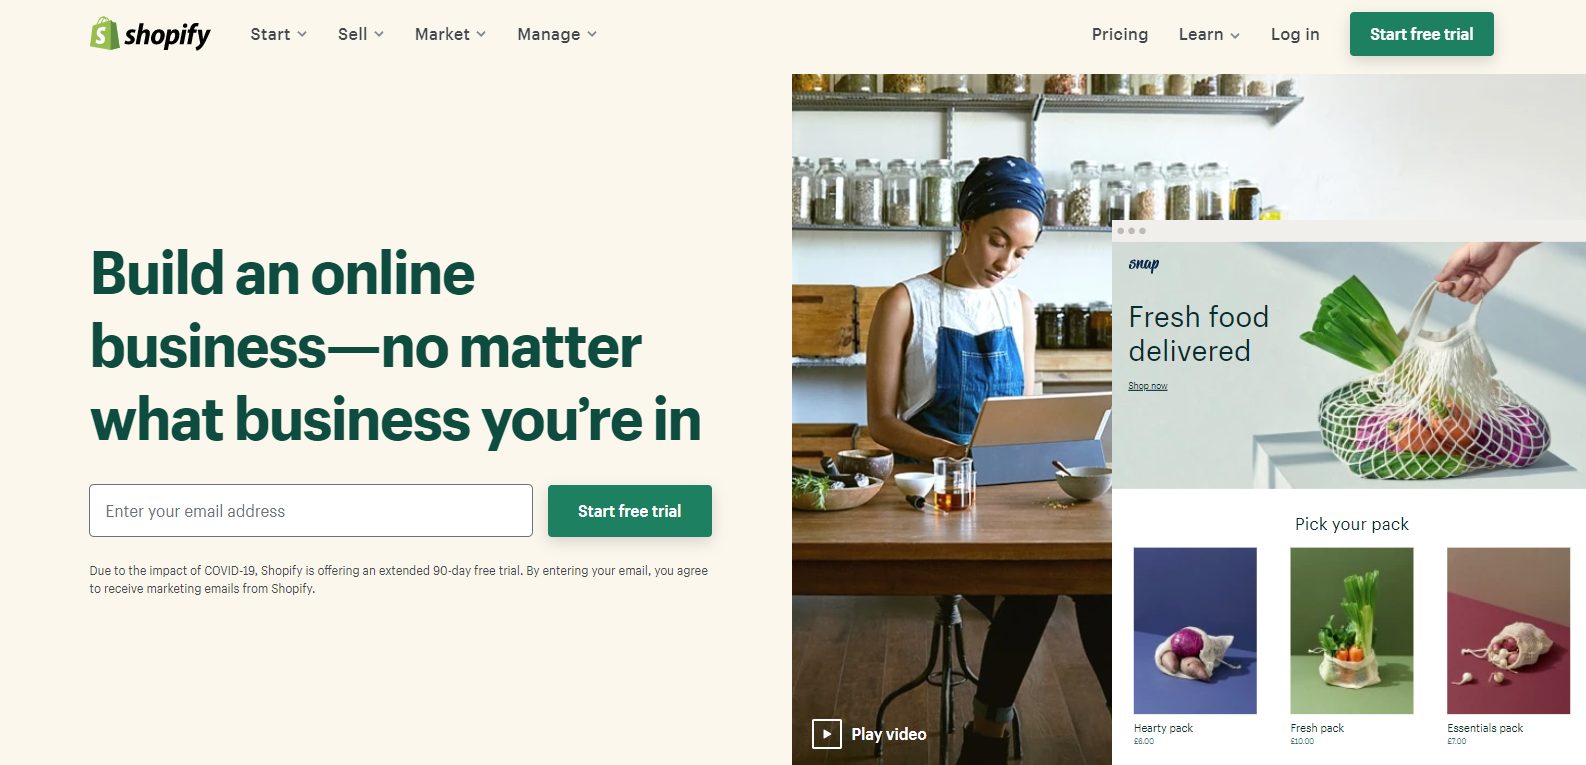
Click here to open the Shopify site in a new window, add your email address, and hit the ‘Start free trial’ button to create your free account.

2. Create logins and choose a store name
Set a username and secure password for logging in, and choose a name for your online store.
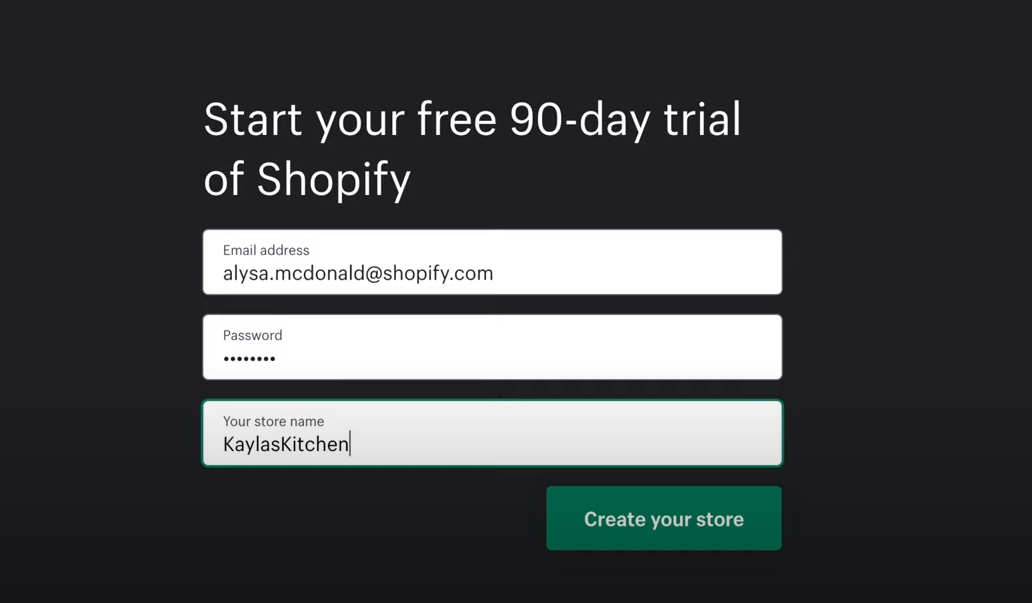
By default, the name you choose will become the URL as well at yourstorename.myshopify.com. However, if you want to continue after the free trial, you’ll have plenty of opportunity to choose a more permanent domain name like yourstorename.com, which you can buy through the Shopify platform.
You can also point an existing domain name to the Shopify servers if you already have one.
3. Enter business details – optional
You’ll then see an optional where you can add details about your new or existing retail business.
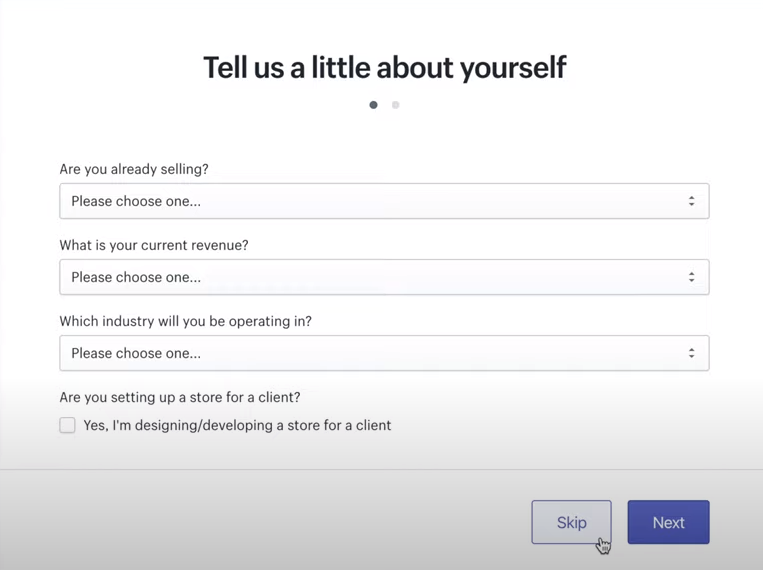
This is optional, but the info may help Shopify to better guide you later if needed.
If you’re creating your own ecommerce website then leave the bottom checkbox unticked, as this is just for Shopify developers building client sites.
4. Add your address and contact info
You then need to add your physical address and contact information so that you can receive your online payments.

You can update these details later if needed.
5. Start adding products
After adding your business info, your ecommerce website will be up and running, ready for you to add products to your Shopify store.
From your admin area, click Products from the left menu area:

You’ll then see a big Add Product button top right on the next screen.
Name your product and give a good amount of product information to help your customers make an informed buying decision.

Add product images to make them appealing to potential customers, and add the prices, checking the ‘Charge taxes on this product’ box if there is VAT or your relevant local tax for customers to pay on the product.
6. Choose a store theme
Clicking the Online Store option on the left under SALES CHANNELS, will reveal sub items that include Themes.

Choosing one of the many available free themes is the starting point for shaping the look and feel of your online shop.
Whether you are selling clothing, jewellery, fitness products, home furnishings… you should find a design to suit your product range. You can then customise it to be more in line with ideas you have for your brand.
There are then a wide range of options to tweak your fonts, colour scheme and layouts.
You will be signposted to an easy to use logo generator, free stock photography to use within your store, and more.
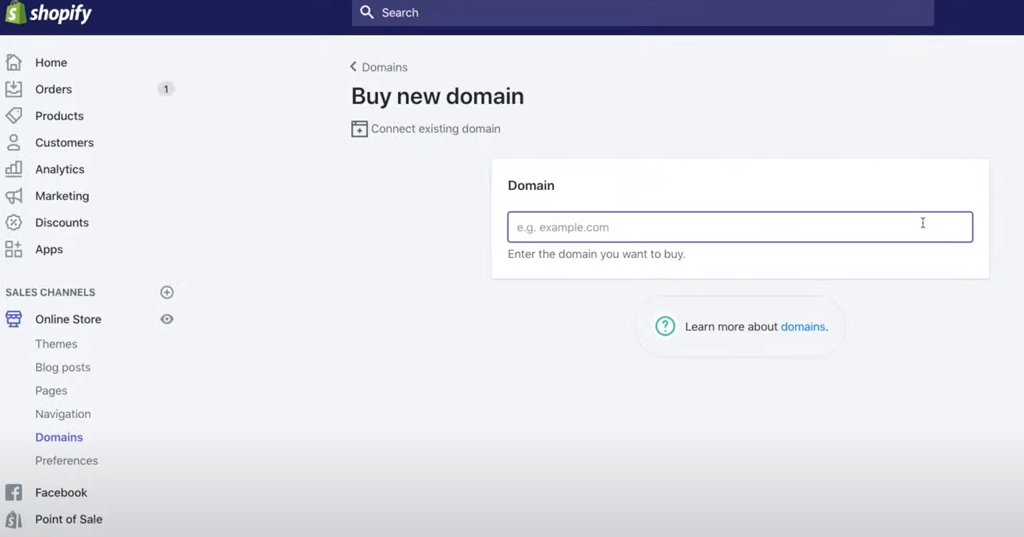
7. Buy a custom domain name
Once you have everything set up and you’re happy with your ecommerce website and how it looks, it’s a good idea to buy a custom domain name – like a .com or .co.uk. This will help to ensure it looks and feels like a proper business website to your customers, and is an important part of building a brand around your online store.

You’ll find this option in the main menu on the left under SALES CHANNELS > Online Store > Domains
8. Create your main website pages
Making products available to buy on product pages is essential of course, but to build a credible ecommerce website, you also need core pages, such as Home, About, Contact etc.

Find the options to do this under SALES CHANNELS > Online Store > Domains
Giving your visitors a bit more background on you, why you’ve created this online store, and how you operate are ways in which you can develop trust – putting some personality into your website. There are templates and guidance to make it quick and easy to create pages like Contact Us and FAQs.
There are certain must-have web pages for an ecommerce store, such as Refund / Returns policies, but Shopify makes this easy with a range of templates containing boilerplate text that you can adapt where appropriate.
9. Create website navigation
Once you have a set of product and information pages, you then need to weave them all together so that visitors can find their way around.
Go to SALES CHANNELS > Online Store > Navigation to create menus.
Links to the homepage and important products and product categories should go in your main header menu, while for an ecommerce website, formalities like Contact and Privacy Policy will often go in the footer.
10. Add online payment options
Once you’re ready to start accepting orders, you need to include settings on the countries where you can do business, an ecommerce payment gateway, and the relevant tax settings.
For many countries, common tax settings are ready to go by default. However, you should check that everything is correct for your needs and overwrite defaults where appropriate.
Easy PayPal set-up and card payment processing via Stripe are available by default.
11. Set shipping options
International shipping can start to get complicated if you plan to sell worldwide – especially if you sell physical products where weight and local carriage charges will be a consideration.
It’s often a good idea to sell in your home country first to make sure everything works well before you think about exporting to more territories or even globally.
12. Launch your ecommerce website
If you’re happy with everything, you can choose from a range of low-cost ecommerce website options that start from £5 per month after your free trial. When you’re ready to sign up, you remove the password protection and launch your ecommerce website to the world.
Then you can start the fun part of marketing your ecommerce store to start bringing in website visitors and customers via Google, Facebook, Twitter or however you want to build your audience.
You can learn more about this all in one ecommerce website solution on the Shopify website and there are various video tutorials on their YouTube channel.
If speed or security are key concerns for your online store, The Retail A to Z highlight these as key strengths of Shopify on their guide to the best ecommerce hosting solutions so you should be in safe hands with this store builder.
It’s also one of the 6 best website builders in 2025 overall according to Good Site Guide, alongside WordPress, Drupal, Joomla, Magento and Blogger, which are used by businesses large and small across every sector.
We hope this advice on how to create an ecommerce website will prove useful for your business. In subsequent posts here at e-Learning Centre, we’ll be creating guides to marketing your ecommerce website with SEO and other channels, and on building other types of website for your business.
